The Project Creation Wizard (v8.xx)
Geniusproject’s "Project Creation Wizard" has been designed to simplify the user’s project creation experience by walking them step by step through the process and ensuring they do not leave out any critical creation steps.
The project creation wizard quickly captures important project information, but more can be entered using the Project description form.
To use the project wizard:
Navigate to the [Projects] tab on the Module navigation menu.
Select "New Project" from the contextual navigation.
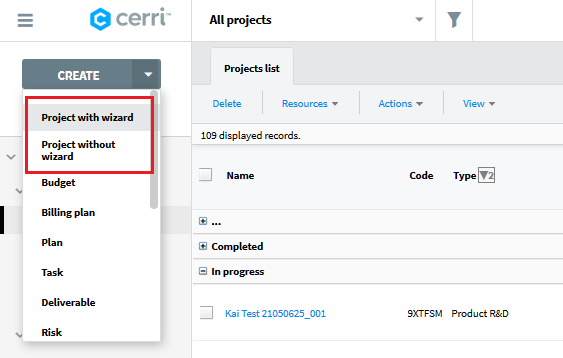
The project wizard will open.
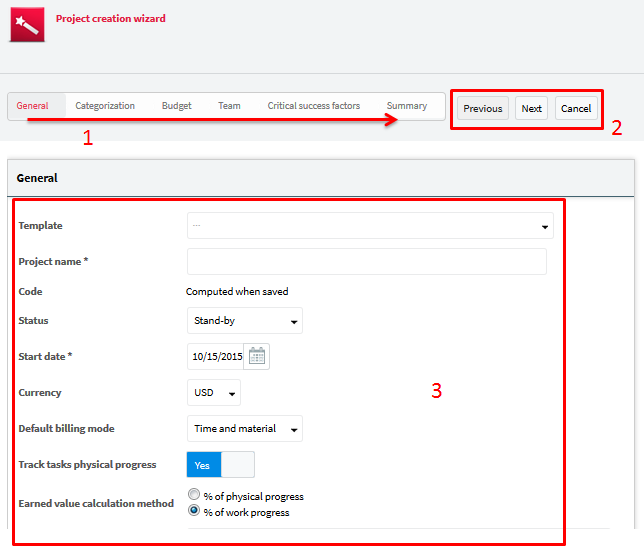
The project wizard is made up of the following elements: A navigation bar indicating the steps (1).
Navigation buttons to move forward or backwards during the process (2). Content window to input the data for the active step (3).
Note: It is also possible to advance or move back by clicking directly on the next step in the navigation bar. It is not however possible to skip a step if its fields are not complete.
The [General] tab
The project wizard opens to the [General] tab. This section holds the most general and basic information about the project.
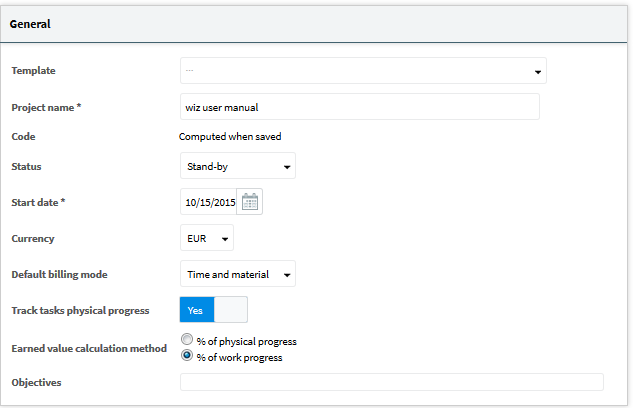
Once all of the fields have been completed, click "Next" or "Categorization" on the Navigation bar.
[Categorization] tab
Here you will find one text field (Sponsor) and up to 14 single or multi-value classification fields, depending on your setup. These classification groups are very helpful for reporting purposes. Only 4 of them are static fields in Geniusproject: Sub-project of, Type, Customer and Priority.
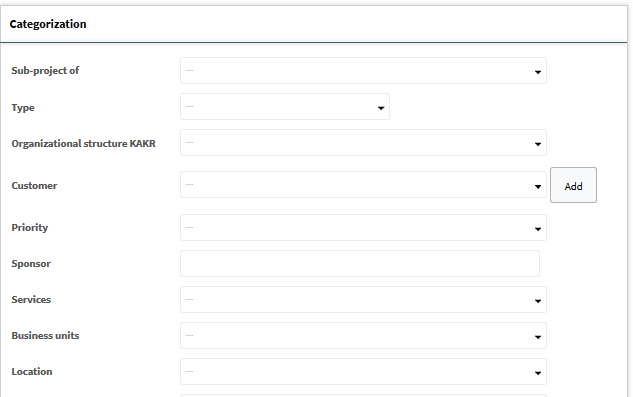
Once the classification fields have been completed, click "Budget" on the navigation bar or "Next" to advance to the next step. If do not want to enter any classification details at this time you can advance directly to the "Budget" step, unless some fields have been set as mandatory by the application administrator.
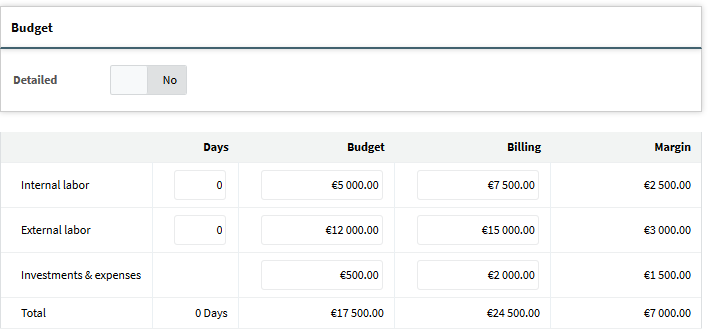
[Budget] tab
The budget screen is where the financial resources allocated to the project are defined as well as its external rates if the project is billable.
A project budget can be detailed or not. If the budget is not detailed the user can simply enter the total anticipated workload split across internal and external labor. It is also possible to enter the internal and external/ billable costs associated to the workload as well as other non-labor related project expenses.
If the budget is detailed, it is then possible to define the costs and billing targets with more finesse, depending on budget axes defined in the application settings. For more information see "Detailed budget".
Once the budget has been entered, click "Team" or "Next" on the navigation bar to advance to the next step. If you do not want to enter budget information at this time, you can advance immediately to the next step.
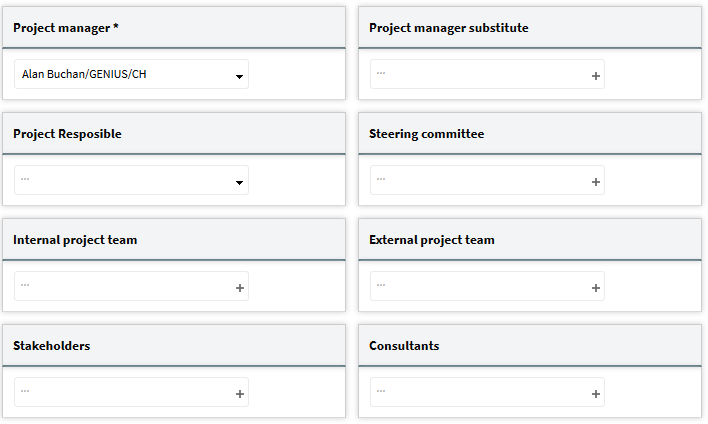
[Team] tab
Now it is time to define your project team. This section is used to select the project participants and identify their role in the project. Geniusproject proposes a predefined team structure with predefined groups and roles.
Note: The following form appears only if no project template has been selected. If a project template has been selected, a different form appears where it is possible to replace the resources inherited from the template by resources of your choice. Once the project has been created, the form as shown here under can then be seen in the "Project Description".
Once the project team has been defined, click "Critical success factors" or "Next" button to advance to the next step. If you will not be selecting the project team at this time you can advance immediately to the next step.
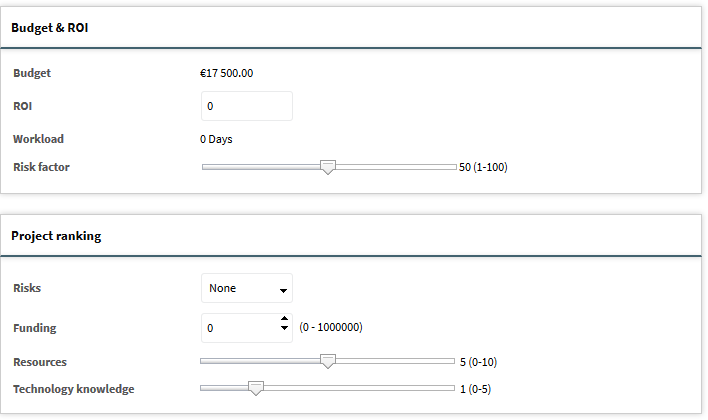
[Critical success factors] tab
The critical success factors section allows you to define how important and aligned the project is with your business and strategy.
This section is divided into 2 parts. The first section is not configurable and contains essential metrics that exist across all projects, they are: budget, ROI (return on investment), forecasted workload and risk factor.
The second section is configurable and can capture up to 10 distinct criteria used to qualify the importance of the project to the organization. The combination of the values will calculate the project score and reflect its importance.
Once the critical success factors have been entered, click "Summary" or "Next" button on the navigation bar to advance to the next step. If you will not be entering a budget at this time you can advance to the next step immediately.
[Summary] tab
This tab offers a quick summary of all the data entered using the wizard prior to creating the project. At this stage it is still possible to revisit any of the tabs to make necessary changes. Simply click on the "Next" or "Previous" button, or directly on the name of the tab you would like to edit on the navigation bar.
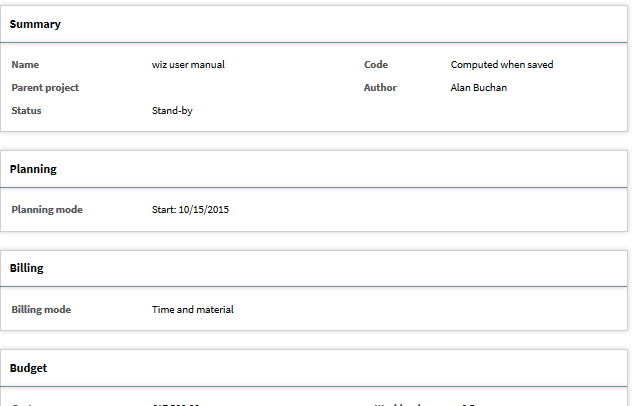
Click "Done" to create the new project, or "Cancel" to abort project creation.
Once the project has been created, Geniusproject automatically opens its "Project Description" form, which can be completed. See "Project Description" form below.
In addition to the project description, Geniusproject has also created the associated budget and Gantt chart for the project.
Related Articles
The Project Creation Wizard (v10.xx)
Cerri Project’s "Project Creation Wizard" is designed to simplify the project creation process by guiding users step by step, ensuring no critical steps are missed. The "Project Creation Wizard" quickly captures important project details, with ...Create a Project without the Wizard (v10.xx)
Navigate to the [Projects] tab on the Module navigation menu and open one of the project views. From the "Create" menu, select "Project without wizard". An empty Project Description opens, with no documents included.Create a Project without Wizard (v8.xx)
Navigate to the [Projects] tab on the Module navigation menu. Select "New Project" from the contextual navigation. An empty Project Description opens. No documents are included.Project Definition (v10.xx)
A well-defined project has the highest potential for successful completion. Unfortunately, the project definition step is often overlooked, leading to many common project issues. Defining a project well means clearly outlining what needs to be done, ...Project Definition (v8.xx)
A well-defined project is a project with the highest potential for success completion. Unfortunately, the project definition step is one that is often neglected and therefore the cause of most project problems. Defining a project well means to ...