The Issue Report (v8.xx)
The "Issue report" is the form project participants will use to report any issues they encounter throughout the lifecycle of their projects i.e. any event that can impact deadlines, workload or project quality, such as:
A change in requirements.
A change in the project environment.
An unexpected problem occurring that was not anticipated during risk analysis. The occurrence of an anticipated and unavoidable risk.
A problem or error that occurred with work already completed or work currently underway. etc.
The author of the report will formally log the issue which will then be sent to the project leader for approval, as per the standard workflow applied to the Issue report. The project leader will be able to access the issue report using the different views included with Geniusproject, and then assess the issue to decide on its type, the impact on cost, workload or deadline and what actions are required.
Once actions for resolution have been created, such as tasks or "To Do's" in Geniusproject, the issue report is closed and the project leader will follow-up on the related actions.
The issue report is a powerful tool to assisting project leaders in identifying recurring problems.
Creating a new Issue
To create a new Issue report:
Navigate to the [Issues & change requests] tab.
Click "New issue" in the left hand contextual navigation menu.

From the content window click on the [Create] menu and select “New issue”

The "Document Creation" dialog box will open where you can select the Project and Phase the new issue applies to.

Click "OK" to validate the selections and the Issue report form will open.
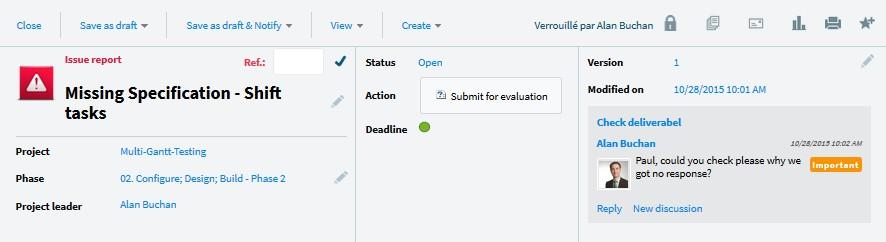
Header
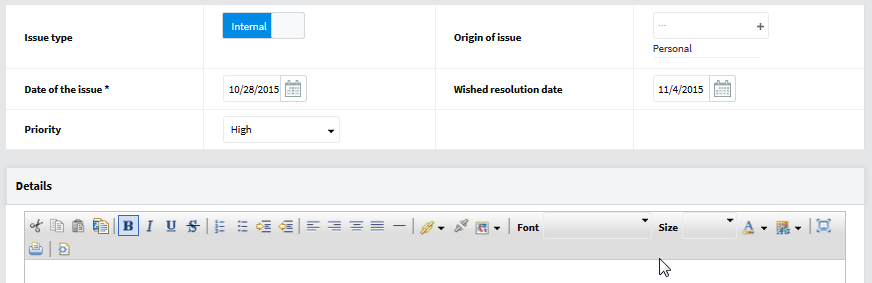
[Description] tab
[Related Tasks] Tab
The [Related tasks] tab is used to specify any and all tasks related to the issue. They can either be impacted by the issue or the actual cause of the issue.
To select the tasks, navigate to the [Related tasks] tab: Click on the "Add" button.
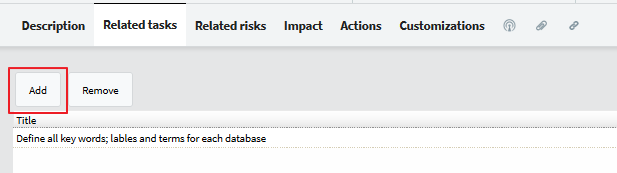
A dialog box will open listing all of the project’s tasks and phases.
Double click on a related task or deliverable to add it to the bottom section of the dialog box or select the items to be added and use the arrows provided to add them.

Note: The values on this tab are for information purposes only and will not have any impact on the management of the issue.
[Related Risks] tab
When planning a project, it is always possible to identify and log potential risks in advance, in order to be better prepared should they occur. Issues reported throughout the course of a project that are related to any of the forecasted risks, can have a direct link made to the risk from the [Related risks] tab.
From the [Related risk] tab:
Click the "Add" button.
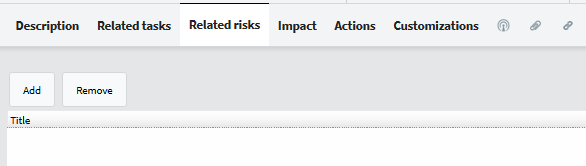
A dialog box will open listing all of the forecasted project risks.
Double click on a related risk to add it to the bottom section of the dialog box or select the risk(s) to be added and use the arrows provided to add them.
[Impact] tab
The fields on the [Impact] tab are for information purposes only and may be used later on to analyze the impact of the issues on the project, or to manage the risks on another project of the same type.
The values on this tab will most likely be completed by the project leader, or by the person processing the issue after an update of the project plan.

[Actions] tab
A rich text field for the project leader, to document all decisions and actions taken to fix the issue.
Delete an issue
To delete an issue:
Navigate to the [Issues & change requests] tab.
Select Issues from the contextual navigation menu on the left.
All of your projects will be loaded in the content window; find the one with the issue to be deleted and select the issue by placing a check in the box next to the title.
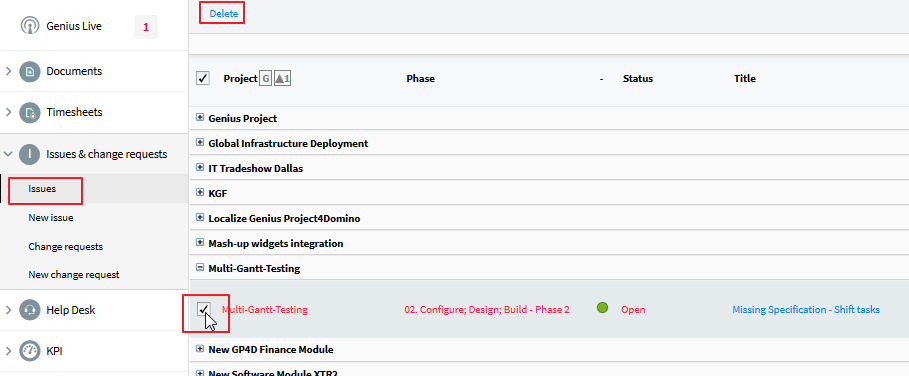
Click "Delete" on the action menu bar.
Click "Yes" to confirm the action in the dialog box that opens and the Issue will be removed.
Process an issue
By default the Issue form has a generic workflow associated to it, however it can be refined if it does not match an organization’s existing issue management process.
The purpose of the workflow is to automatically circulate an issue from its author to designated resources for revision and approval.
To submit an issue for approval once it has been completed, the author simply must:
Click the Submit button in the header
A dialog box will open asking for confirmation of the action. A field is available to include comments if desired.
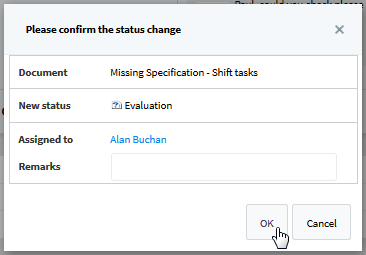
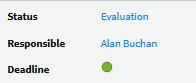
The issue will be updated with its new status displayed in the header, and the name of the person who is now responsible for it.
Note: As part of the generic workflow, an email will be sent to the responsible resource(s) notifying them of the action they need to take.
Once the responsible resource has reviewed the issue and added any necessary information to the form, they can either approve or reject it.
Define issue workflow
A generic revision and approval workflow is applied by default to the Issue form. The cycle of the workflow is indicated in the diagram below.
In the event that the workflow does not match an organization’s existing processes, it can be changed in the "Workflow" section of the Setup for the [Projects] module.
To learn more about defining workflows see admin manual.

How issue status influence project status
Issues can be followed from the "Issues" view on the [Issues & change requests] tab. They also appear in the Project overview documents until they are marked as "Processed".
To access Project Overviews:
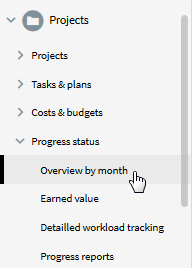
Navigate to the [Projects] tab.
Select "Progress status" from the contextual navigation menu and click "Overview by month".
The project overview highlights will appear in the content window indicating the status of various metrics, including Issues.

To access more detailed information simply click on the Project name to open the overview, and scroll down to the issues section.

Open issue reports: Displays the number of Issue report documents that are still open.
: Good. By default, no reported issue remains open, i.e. the "Issue report" are all in a completed status.
: Medium. By default, at most three issues remain open.
: Bad. More than three issues that are still not closed, i.e. the "Issue report" documents are still in an open status.
The default thresholds can be changed in the "General" setup document.
Related Articles
The Issue Report (v10.xx) [TR]
The "Issue report" is the form project participants will use to report any issues they encounter throughout the lifecycle of their projects i.e. any event that can impact deadlines, workload or project quality, such as: A change in requirements. A ...Project Status Report (v8.xx)
The document Project status report is an excellent combine of known Project report and Project overview. The report is a predefined form in Genius Project (enable subform to use this document). The document can be created manually with the "Create ...Project Status Report (v10.xx)
The Project Status Report document is an excellent combination of a Project Report and Project Overview. The report is a predefined form in Cerri Project (enable subform to use this document). The document can be created manually using the "Create ...Excel Report Templates (v8.xx)
Convert any Genius Project view into a Microsoft Excel report or chart. Create your reports layouts only once, store them in the template repository and use them at will. Take advantage of advanced features in Microsoft Excel such as Pivot Tables, ...Approving an Expense Report (v10.xx)
Submitting an expense report for approval To submit an expense report for approval, it is sufficient to change its status to "To be approved." From the expense report, click "Workflow" on the action menu bar and select "To be approved". Approving an ...