Sending an Email from Cerri Project (v10.xx)
In the [Create] menu of any Cerri Project view, select the option [Create->Email].
The "Document Creation" dialog box will open, where you can select the Project and Phase the new email applies to.
Click [OK] to confirm your selections and the email form will open.
- Enter the email title.
- Select addressees (To, Cc and Bcc) from Cerri Project resources using the resource selection widget.
- Add external recipients to the list by clicking the plus icon in the Add new value field.
You can repeat this operation as many time as needed to add multiple external recipients.
The list of addressees is now displayed:
- Enter your email text in the "Contents" field.
- Attach files to your email as with any other Cerri Project record (form).
- Select the [Send] option from the action menu bar to send your email, or [Save as draft] to save it without sending.
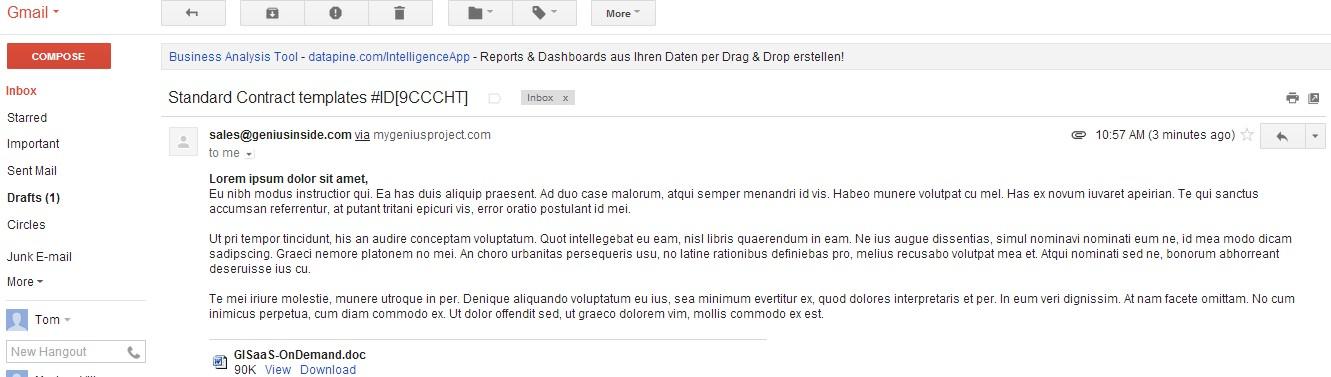
This is how an email sent from Cerri Project looks, in this case in Google’s Gmail:
The email header
The email [Contents] tab
The Cerri Project email function sends the contents of the "Contents" rich text field along with any attached files.