Posting Time to an Assignment without using a Timesheet (v8.xx)
It is possible to post time to different assignments without using a timesheet. There are three possibilities:
By modifying the actual value and balance remaining directly in the task document. By doing so however you lose the details of who did what and when.
By modifying the actual directly in the assignment document. By doing so however you lose the details of the when the work was done.
Using the time entry feature on the assignment page or in Genius Live! Project Wall. By doing so, no details are lost.
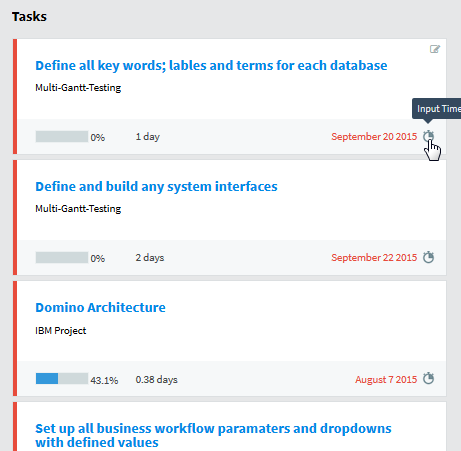
To post time to an assignment using Genius Live! select the stopwatch on tasks shown in the right column:
To post time to an assignment without using a timesheet:
Navigate to the [My workspace] tab.
Select "My assignments" or My Project Wall in the contextual navigation menu. In the content window, select the assignment you would like to update.
Click the stopwatch icon on the action bar menu.

A dialog box opens to report time on the selected assignment
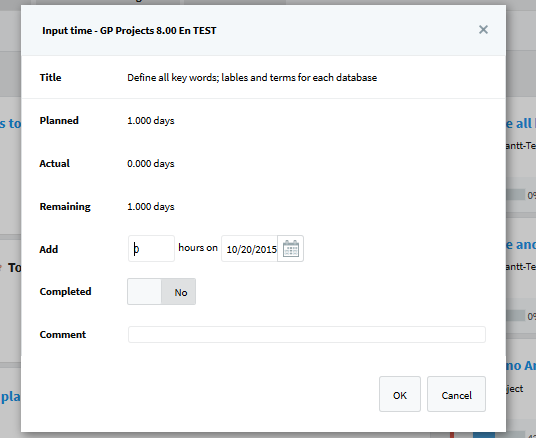
Once the input is validated by clicking "OK", the time added will be applied to the actual amount of work done on the task so far and the balance remaining will be recalculated.
Note: If a timesheet already exists for the period the time has been input for, the entry will
automatically be added to it on the specified date. If a timesheet does not exist, the system will automatically create one for the corresponding period and add the entry to it. Therefore using either the method above or timesheets have the exact same results. In addition, the two methods can also be combined.
Note: To input time without using Timesheet the Application Manager has to enable the role „Input Time“ on the Notes ACL.
Related Articles
Posting Time to an Assignment without using a Timesheet (v10.xx)
It is possible to post time to assignments without using a timesheet. There are three ways to do it: Modify the actual value and balance remaining directly in the task document. Caution: This method loses details of who did what and when. Modify the ...Create a Timesheet (v8.xx
Timesheets can be automatically created by the server at the beginning of each week. In this case, the timesheet will be automatically populated with a resource’s assignments for the upcoming week. Automatic generation of timesheets can only be ...Create a Timesheet (v10.xx)
Timesheets can be automatically created by the server at the beginning of each week. In this case, the timesheet will be automatically populated with a resource’s assignments for the upcoming week. Automatic generation of timesheets can only be ...Timesheet Approvals (v8.xx)
An approval cycle can be enabled that requires users to submit their timesheets for approval once they have been completed in the [Timesheets] module. If the approval workflow is not enabled, users will mark their timesheets complete directly. The ...Timesheet Approvals (v10.xx)
Cerri Project allows for timesheets to be submited and approved once they have been completed in the [Timesheets] module. If the approval workflow is not enabled, users will mark their timesheets as complete directly. The update of assignments in the ...