To access the Setup & Administration section of the Portfolio database, the Admin user must click on the gear icon at the top right-hand corner of the screen and select [Portfolio] from the drop-down list.
General
The ’General’ setup document is made up of multiple tabs.
Miscellaneous
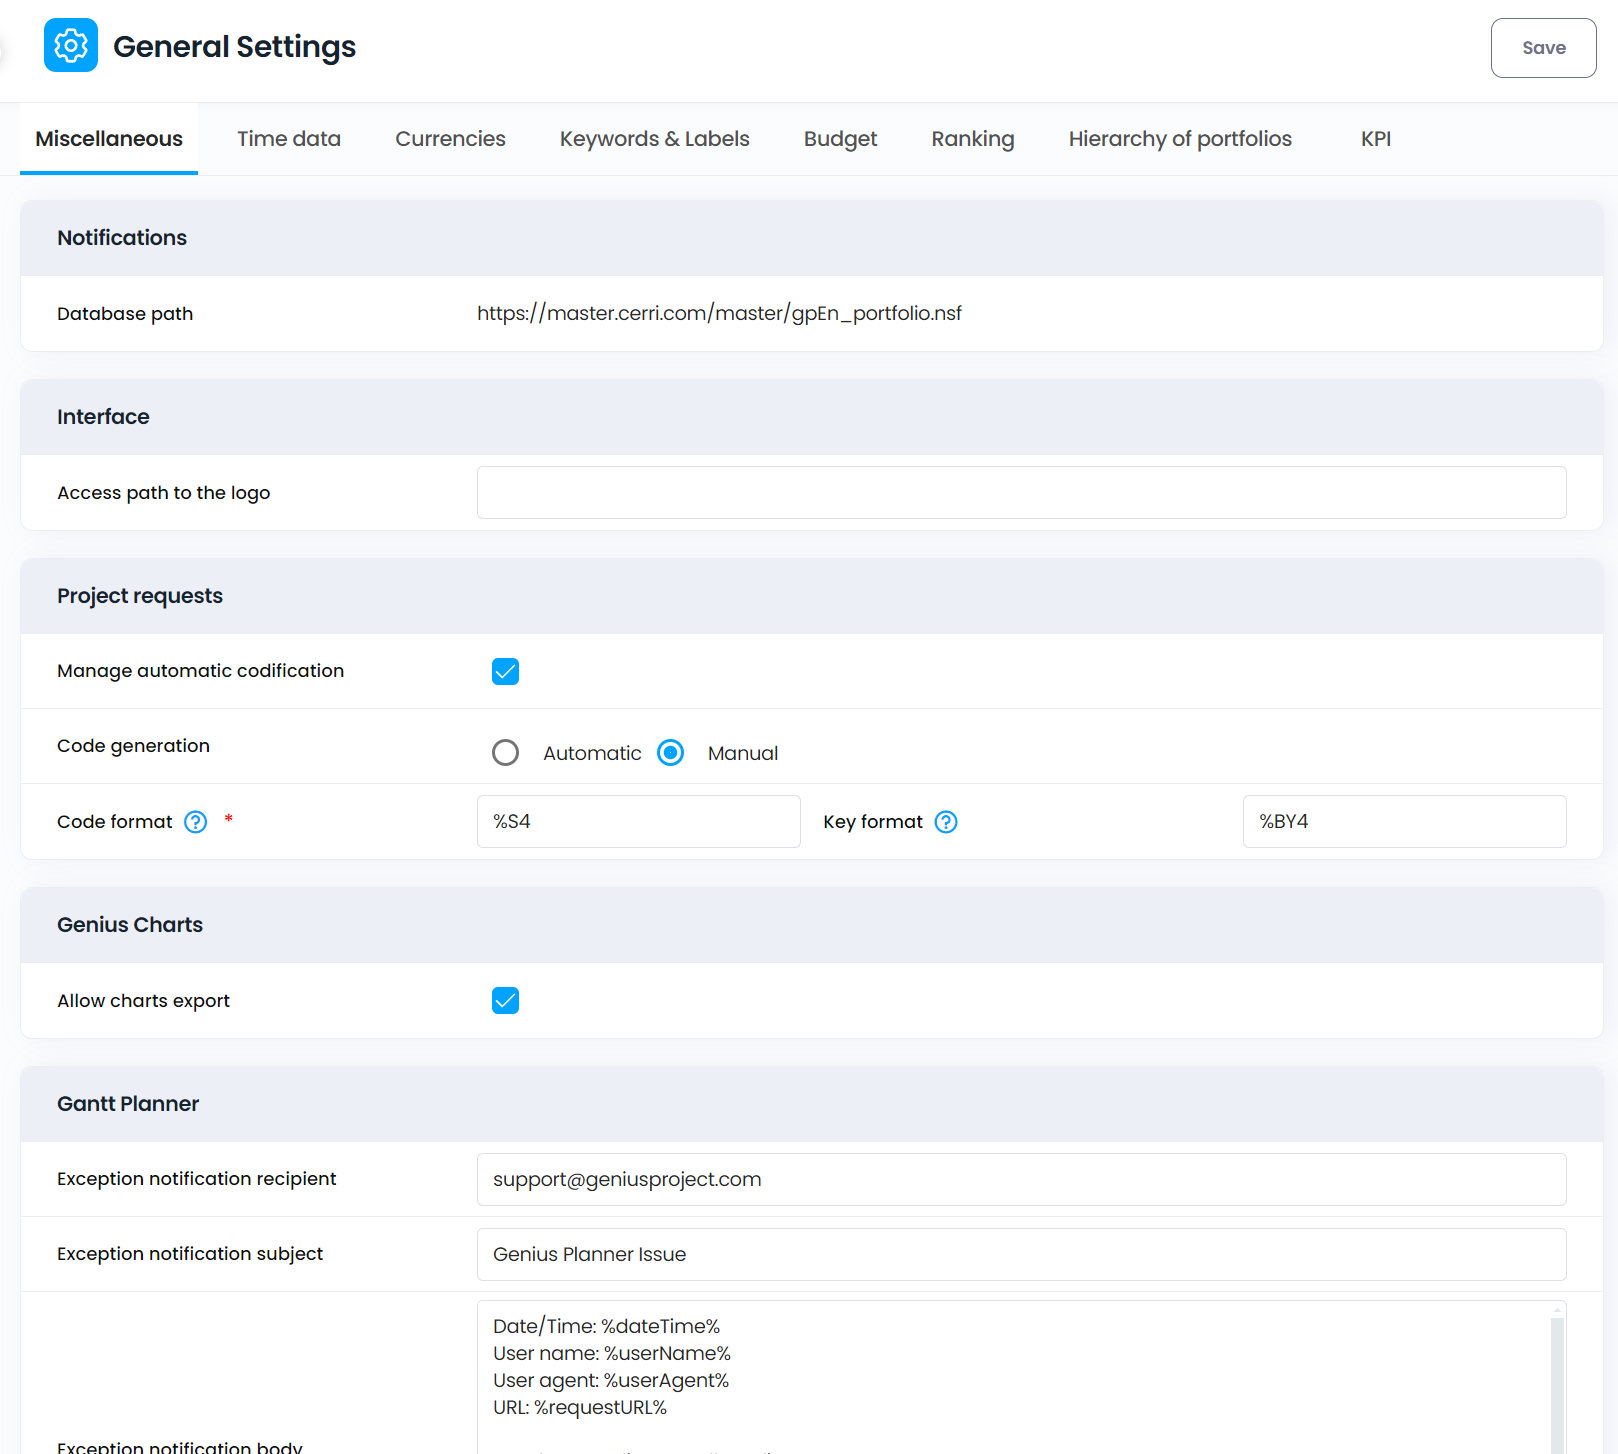
Do not modify the following sections: Notifications and Interface.
Field | Use |
Notification | Database path | Used to reference within the message. Used only for on-premise installation. |
Interface | Cerri Integrator | Specify if Cerri Project Integrator in enabled or not. Cerri Project Integrator makes the management of attached files easier. It allows the generation of preformatted Microsoft Excel templates. Cerri Integrator use an ActiveX control and is available only with Microsoft Internet Explorer. |
| Access path to logo | Reserved for Cerri. |
Project request | Manage automatic codification | If "Yes," Cerri Project automatically generates code according to the parameters. |
| Code generation | No longer supported. |
| Advanced format | Choose between simple and advanced code formatting.
The "code format" and "key format" are defined by using tags (see below). If advanced, the "key format" is given by a formula allowing complex coding capabilities. |
| Code format | If "Advanced format" = No. The following tags may be used to build the code: %A = User abbreviated name with 4 characters, created by the server.
%U = External ID as it is defined in the 'Resource' document. %S[1-9] = Sequential number with 1 to 9 positions. %X = Unique value based on the current date and hour, created by the server. %Y[2/4] = Year, on 2 or 4 positions. Default: 4. %B = Replica ID of the Projects database. Code example: 'MI.%U.%S3'
If "Advanced format" = Yes, it is possible to use @Formulas to compute the code. It is also possible to use the code %S[1-9] for a sequential number from 1 to 9 digits.
Code example: '@Right(@Text(@Year(@Now));2) + \".\" + @Right(@Unique;\"-\")+\"%S6\' will generate a code like '10.84CJ4Q000005'. |
| Key format | If "Advance format" = Yes: A formula to compute the code. Example: A formula returning the database unique ID (@ReplicaId) .
If "Advanced format" = No: The available tags for code building can also be used for the key. The key is used only if the code format contains a sequential number ('%Sx'). A numbering document containing the last number in the sequence is then generated in the database 'Locks & Numbers' with the given key.
Key example: '%B%Y4' With this key, the numbering starts anew at 1 each year.
|
Cerri Charts | Allows chart export | If "Yes", various exports will be available through right-click directly from the charts |
Gantt Projects | Update when editing | Specify if stored multi-project Gantt charts should be updated or not when reopened. |
Time Data
Those parameters are editable only during initial setup.
Field | Use |
Weeks numbering | European ISO or American ANSI. |
Working days | Defines which days of the week are working days. |
First day of the week | Specifies which day is considered the first day of the week. |
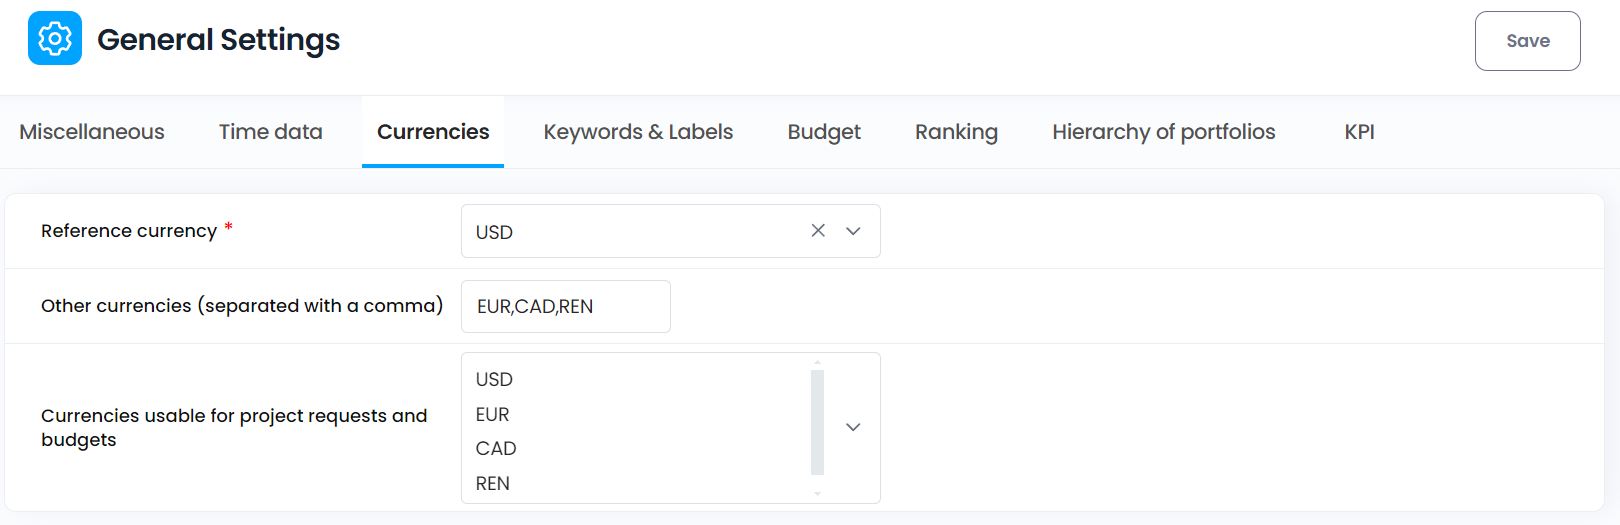
Currencies
Cerri Project is designed to allow organizations to define the various currencies they intend to use within the application and to define a ‘master’ currency for consolidating financial information across these currencies.
When working with multiple project databases, each can have its own default currency. The reference currency defined in the Portfolio database is the one used for all Portfolio reports.
Field | Use |
Reference currency | The currency for all portfolio data |
Other currencies | Lists all other currencies available to project databases |
Currencies usable for project requests & budgets | Selected currencies that can used for project requests & budgets |
Keywords & labels
In a multiple project database environment, it may be useful to have a reference for keywords, avoiding the need to redefine them in each project database.
Field | Use |
Reference database | Identifies in which database all keywords & labels are defined. |
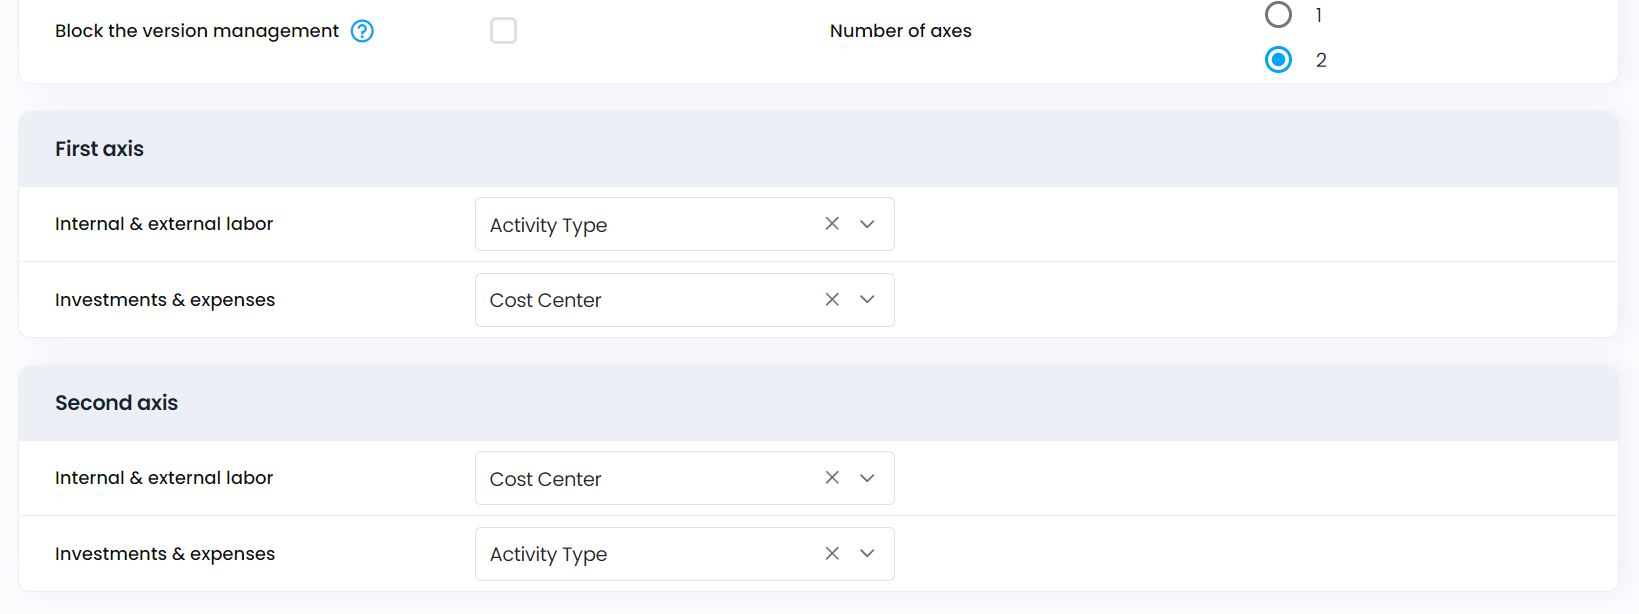
Budget
The Budget tab is used to set the organization’s overall budget format.
Field | Use |
Type | Global: A single budget will be used for projects, regardless of whether they span multiple years. Yearly: For projects spanning multiple years, budget reports will be broken down by year. |
Period start | The start date of the first period being captured in the system. |
Tasks period | Only visible if the budget type is set to ‘Yearly’. Specifies which task date to consider in project budgets. |
Costs period | Only visible if the budget type is set to ‘Yearly’. Specifies which cost date to consider in project budgets. |
Block the version management | Specifies whether multiple budget versions are allowed (Yes or No). |
Number of axes | Indicates whether the budget report will break down into one or two levels of categorization. Possible values: 1 or 2. |
The section below is driven by the number of axes selected above. Each field specifies the budget category for each axis, for both labor and non-labor-related costs.
Ranking
The ‘Ranking’ tab offers organizations the option to include up to 10 fields to be used to calculate project ranking.
Each field represents a unique ranking criteria and its weight in the ranking calculation i.e. 25%. When PMs create new projects or project requests, the values they assign each criterion is used by the system to automatically calculate the project’s overall ranking.
Ranking fields can be:
A list Computed
A numeric value A value range
The type for each field is to be defined during the configuration of the system
Field Use |
Computed List - the default list includes the choices below, but can be changed to better reflect an organization’s terminology: Field type/ option o Unacceptable Value – Manually enter a numeric value

Value Range – a slider bar to indicate value

|
Field Use |
Label The name of the ranking criterion |
Weight The weight it holds in the overall ranking calculation |
Mandatory Whether the field is mandatory or not |
The options are based on the selected field type: Field type ‘List’: List options Field type ‘Value’: Limit: The maximum value that can be entered TBD Unit: the unit of measure Field type ‘Value range’: Values range: the first and last values for the range i.e. 0-100 Field type ‘Computed’: Formula: the formula necessary to calculate the computed value |
Default Value The default value upon creating a new project or request |
Hierarchy of portfolios
Cerri Project’s Portfolio module allows organizations to design a three-tier hierarchy for their project portfolios. The label for each level is used to represent the category of projects that will be displayed, e.g., Division, Business Unit, Program.
Once the level labels are defined, it is possible to have unlimited portfolios at each level of the hierarchy.
Note: This feature has been replaced with OBS (Organization breakdown structure).
KPI
Defines how KPI actuals will be tracked.
Field Use |
If "Yes," indicates that projects' KPI targets are defined by project and by years.
Yearly target If "No," indicates that projects KPI’s targets are defined for the whole project |
Defines how KPI actuals are tracked. Options include: Metric capture mode - On deliverables: Tracking occurs when completing given deliverables. - By month: Tracking occurs when creating the monthly "Progress report", with an extra tab is added to the "Progress report". - Free: Tracking occurs at any time in a "KPI tracking document".
|
If "Yes," the "Progress report" will be automatically generated to manage KPI tracking. Note: The agent "Generation of monthly reports" in the project database should be enabled. Automatic
generation of
progress reports |
|
Exchange rates
It is possible to define monthly exchange rates for increased accuracy. Cerri Project lets you define exchange rates by month for the secondary currencies.
Note: If a rate for the current month/year is not available, the system will use the last available rate in the timeline.
Updating the exchange rate
To create monthly exchange rates, access the [Portfolio] modules "Setup" context, select the "Exchange rate" view, and use the action "New periodic rates".
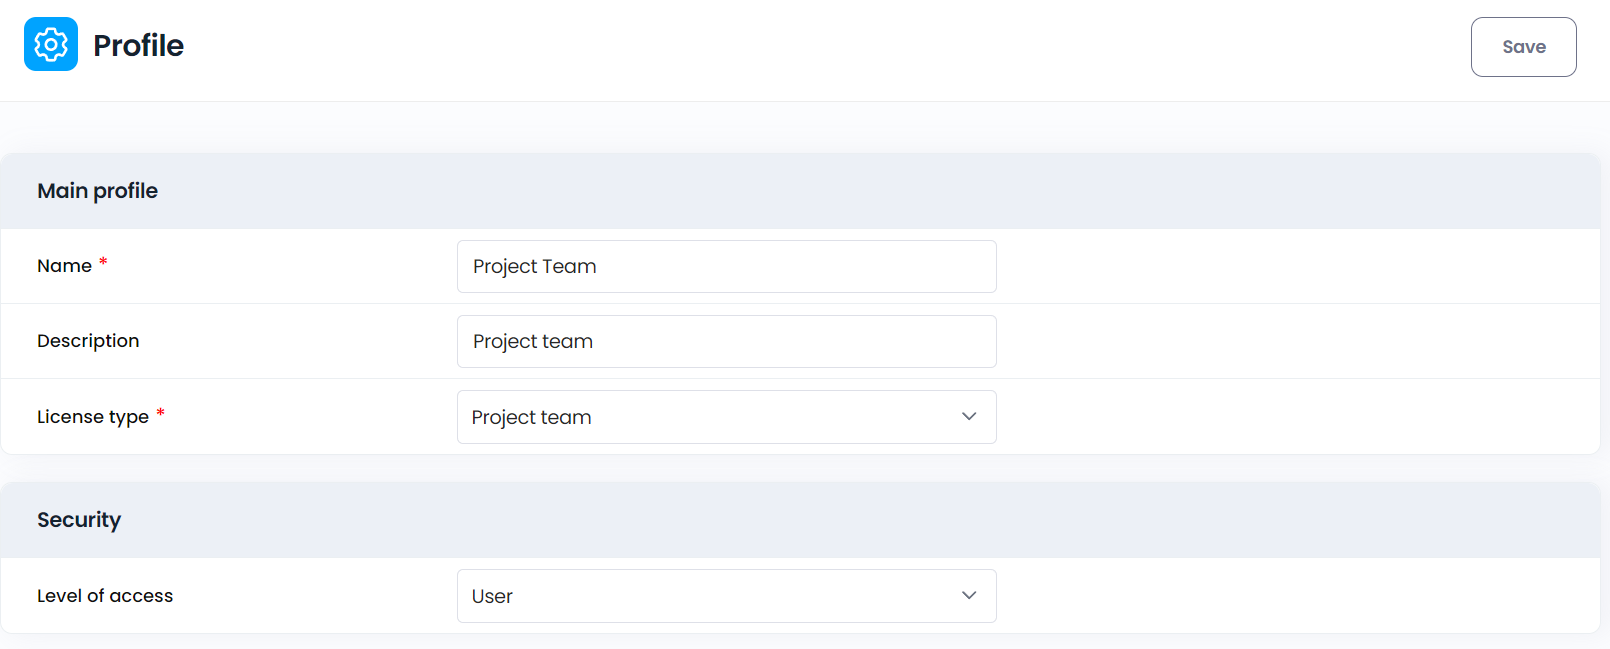
Profiles
Access to Cerri Project is profile driven. Each licensed user is associated to a unique profile, and each profile defines what information its assigned users have access to.
There are seven default profiles available, however it is always possible to create as many more as needed.
The default profiles are: Administrator, Project leader, Project team, Stakeholder, Timesheets, Without license: generic, and
Without license: not generic.
Field | Use |
Name | The name of the profile, as it will appear in the Navigation context documents. Free text. Mandatory. |
Field | Use |
|
Description | The description of the profile. |
Active resource | Yes or No. Inactive resources may still be defined in the application, but they cannot be assigned to projects or tasks. This is usually meant for resources that have left the company but must be retained for historical reasons (e.g., rates, assignments). |
Main profile
Field | Use |
License type |
The type of license for this profile. Possible choices are:
- Project leader
- Project team
|
Generic resource | Visible only if 'License type' is set to 'Without license'. This filed specifies whether the profile is for generic resources.
|
Level of access
Field Use |
Level Visible only if the option 'Management of the user profiles and associated groups' is set to ‘yes’ in the General setup document for the 'Resources' database. This field specifies which of the access profiles defined in the 'Resources' database will be applied to this navigation profile. |
Note: SaaS installations have a limitation of 10 Profiles.
Navigation
Cerri Project is a multi-database system with a single point of entry, granting users access to data stored in its different databases, referred to as ‘Modules’. (See the "Architecture and agents" section for additional information on the various modules and their interactions).
Navigating through Cerri Project is intuitive and can vary depending on a user's license type, access rights, and navigation profile.
The Cerri Project user interface comprises various elements. The main entry point is through the ‘Projects' database, and the visible modules, views and menus depend on the user's navigation profile.
How navigation context is computed
The application determines a user's navigation context as follows:
Checks if a context is defined for the database and the user's profile.
If none is found, checks if a context is defined for the database and the "Other" profile.
If none is found, check if a context is defined for the type of database and the user's profile.
If none is found, checks if a context is defined for the type of database and the "Other" profile.
If no context is found, a message appears: "No navigation for your role..." The default navigation is the applied (in the web client, the first one found is used).
Note: Once the users are correctly published, you must first check if navigation contexts are defined for the specific database, and check if one of them is defined for the "Other" profile.
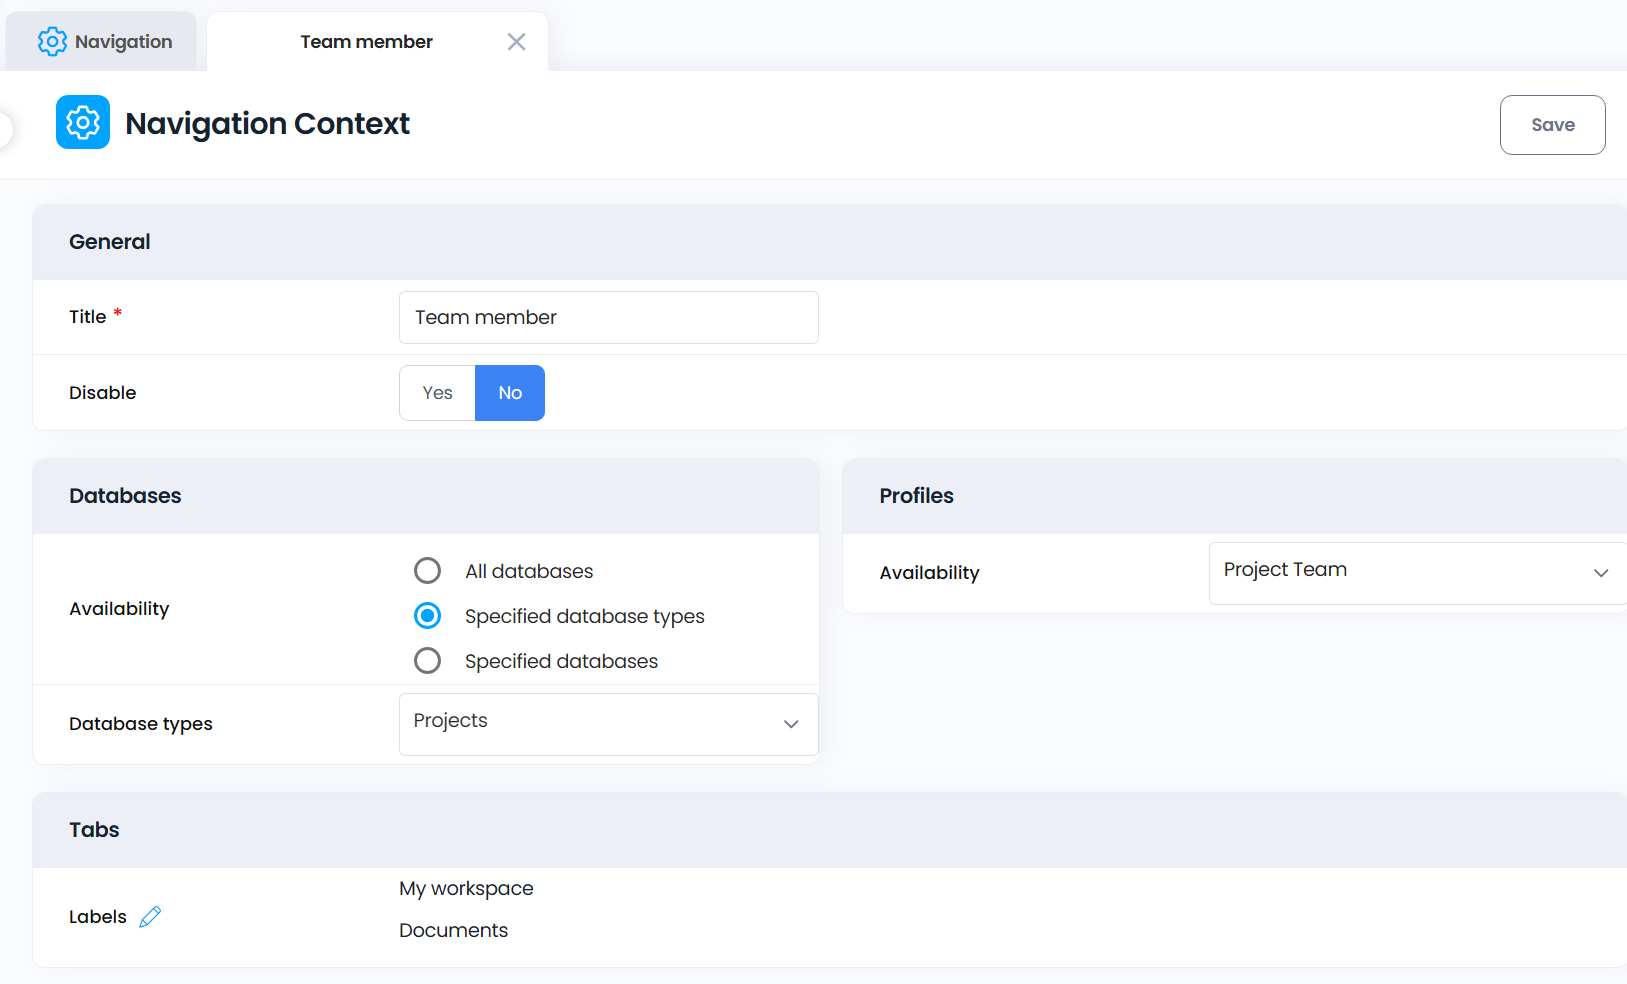
Navigation Context
The ‘Navigation Context’ is the first step in customizing Cerri Project’s navigation. It defines which tabs are visible in mono and multi-project modes for each role. By default, roles correspond to license types but can also be customized.
To create a new Navigation Context:
- Navigate to the Setup tab in the Portfolio database.
- Select «Navigation» from the menu on the left.
- Click the [New navigation context] button on the action menu bar.
- The context form will open.
Field | Use |
Title | Assign a name |
For database type | Indicates which type of database the navigation applies to. Possible values are:
- Resources
- Projects
- Archiving
- Consolidation
- Timesheets
Currently, only navigation for 'Projects', 'Archiving' and 'Consolidation' databases are taken into account. The other ones are reserved for future use.
For example, it is possible to have a different navigation for a 'Projects' and 'Archive' database.
|
Which databases | The options available in this field are determined by what has been selected in the «For database type» field. One or several databases can be selected to apply this navigation to. The values are the linked databases of the selected type. |
For the profile | The profile the context will apply to. 'Other' is applied to users without a profile, i.e. users who connect to the system without being declared as a resource. This applies only to on-premises installations. |
Disable | 'Yes' or 'No'. The context is not available if disabled. |
Labels | The list of tabs for the context. Once the document is saved, a Navigation tab setup document is created for each entry in the list. An entry that already has an existing document cannot be renamed, only moved or removed. Keywords selection field. The label can be changed directly in the corresponding 'Navigation tab' setup document. |
Save and close the document once it is complete, then move on to the Navigation tab setup document.
Navigation Tab
The ‘Navigation tab’ document is used to define the entries displayed for each of the tabs on the "Module" menu bar in Cerri Project main user interface. The tabs are defined in the Navigation context setup documents. It defines the "Contextual Navigation Menu" of each Module.
The ability to customize each tab (Contextual navigation) is very useful when defining groups of functions, adapting the software’s vocabulary to the company's standards, or including new customized options added to Cerri Project.
Field | Use |
<Subject> | The label of the tab as it was entered in the parent 'Navigation context' setup document. Editable. If modified, the parent document is updated. |
For the profile | The profile(s) the tab will apply to. Computed. Retrieved from the parent 'Navigation context' setup document. |
Entries\Labels | The list of entries for the tab. Once the document is saved, a Navigation entry setup document is created for each entry in the list. Already existing entry documents can be renamed, moved or removed. The entry label can be changed also in the corresponding 'Navigation entry' setup document. |
Disable | 'Yes' or 'No'. The tab is not displayed if disabled. |
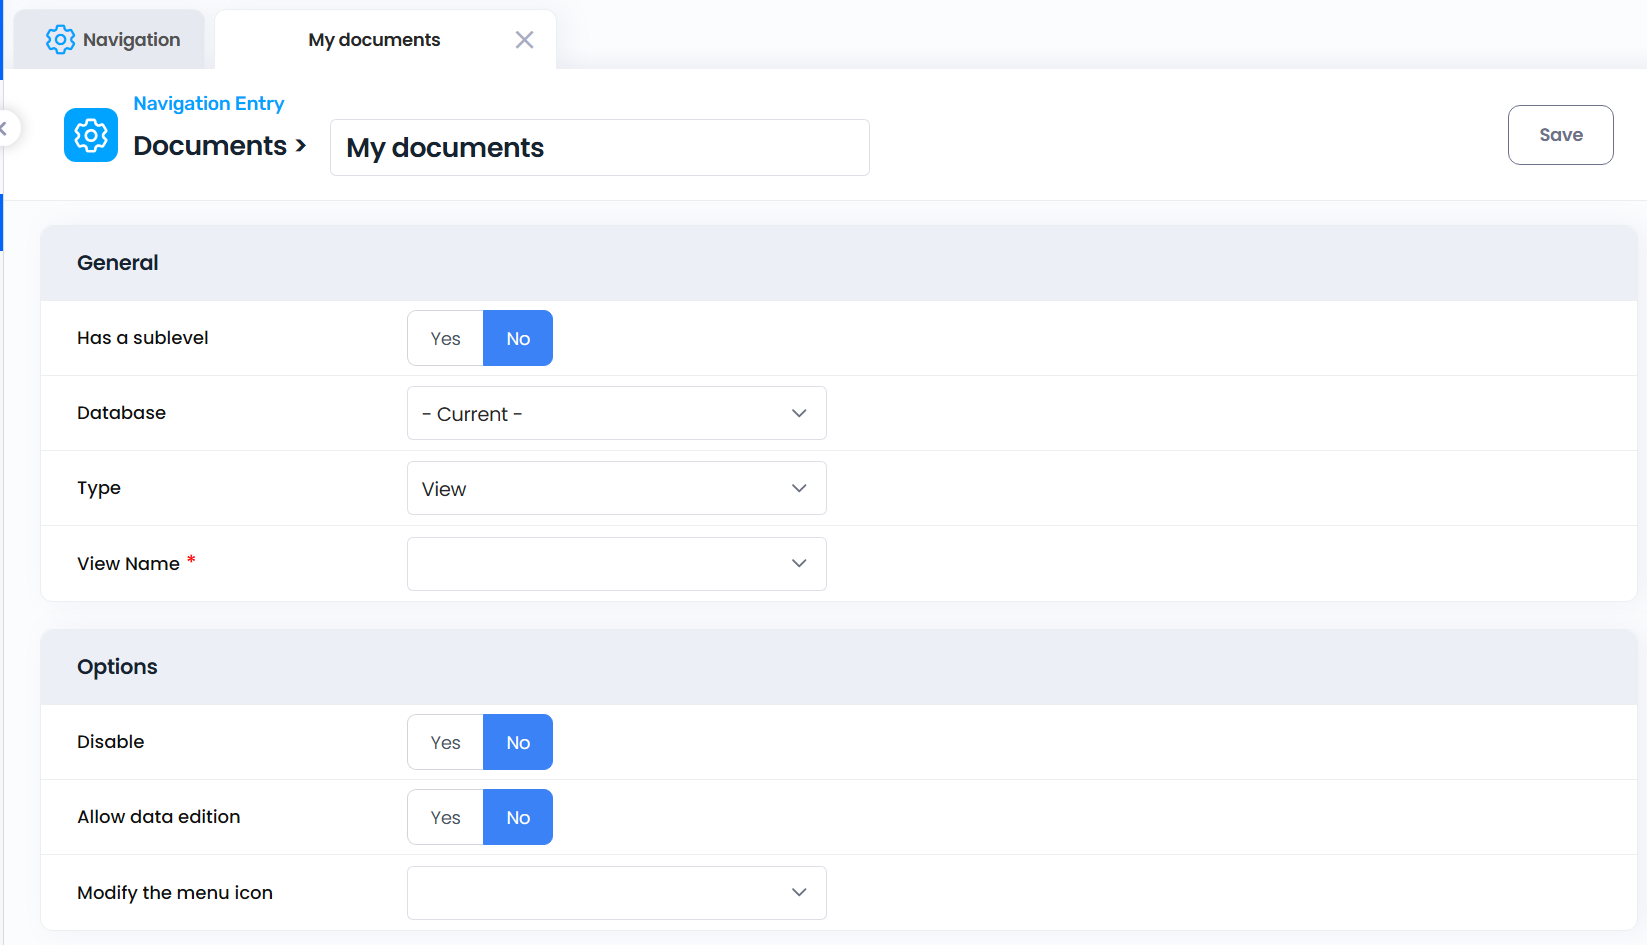
Navigation Entry
The ‘Navigation entry’ document defines what is displayed for each entry listed in the "Contextual Navigation Menu" of Cerri Project. The entries are defined in the Navigation Tab setup documents under ‘Entries’.
Field | Use |
<Subject> | The label of the entry, as entered in the parent 'Navigation tab' setup document. If modified, the parent document is updated. |
Has a sublevel | If "Yes", indicates that this level is a node with sublevel entries. |
Database | Visible only if "Has a sublevel" = "No". Indicates the database the entry resides in. Possible values include:
Current (the active 'Projects' database the user is navigating in), Portfolio, Resources, Activity reports, User's mailbox , <List of all 'Projects', 'Archive', 'Consolidation', 'Simulator' and External linked databases.
Single selection field.
|
Sublevel Labels | Visible only if 'Has a sublevel' = 'Yes'. A list of sublevel entries for the context. Once the document is saved, a 'Navigation entry' document is created for each sublevel entry. An entry cannot be renamed, only moved or removed. Keyword selection field. The sublevel entry label can be changed directly in the corresponding 'Navigation entry' setup document. |
Type | Visible only if 'Has a sublevel' = 'No'. Specifies the type of entry, such as:
Database: Opens database specified in 'Database' field.
View: Opens designated view.
Page: Opens designated page.
Form: Opens designated form.
Frameset: Opens designated frameset.
URL: Opens designated URL (to be implemented).
Project description: Opens project description (only works in mono-project-mode).
Project plan: Opens project plan (when there is more than one plan in the project, a dialogue box appears to select a plan. Only works in mono-project-mode).
Chart: Opens designated chart.
Dashboard: Opens designated dashboard (single selection field).
|
Name | Visible only if 'Has a sublevel' = 'No' and the 'Type' is not 'Database', 'Project description,' or 'Project plan'. The value depends on the selection in the 'Type' field: URL (for opening a URL or the name of the item. |
Disable | Set to 'Yes' or 'No' to disable or enable the entry in the menu. |
Create a new View
To create a new view:
- Select the appropriate navigation context.
- If creating a new view for all users with the Project Manager profile, select that navigation context.
- Choose the navigation menu tab:
- Select the tab where the view will appear (e.g., Projects).
- If the view should appear as a sublevel, select the required sublevel.
- Add a new entry:
- Open the context document and click the pencil icon (labels).
- Enter the value and click the plus sign to add it to the list.
- Confirm the dialogue with Update and save the document. A new entry named "New Entry" is created.
- Assign the view to the new entry:
- Refresh the page and the new navigation entry is now ready to get a view assigned.
Open the new entry.

- Select the database where the view is stored (e.g., 'Projects' database).
- Specify the type and name of the view.
- Save and close the document. Refresh the page to use your new view.
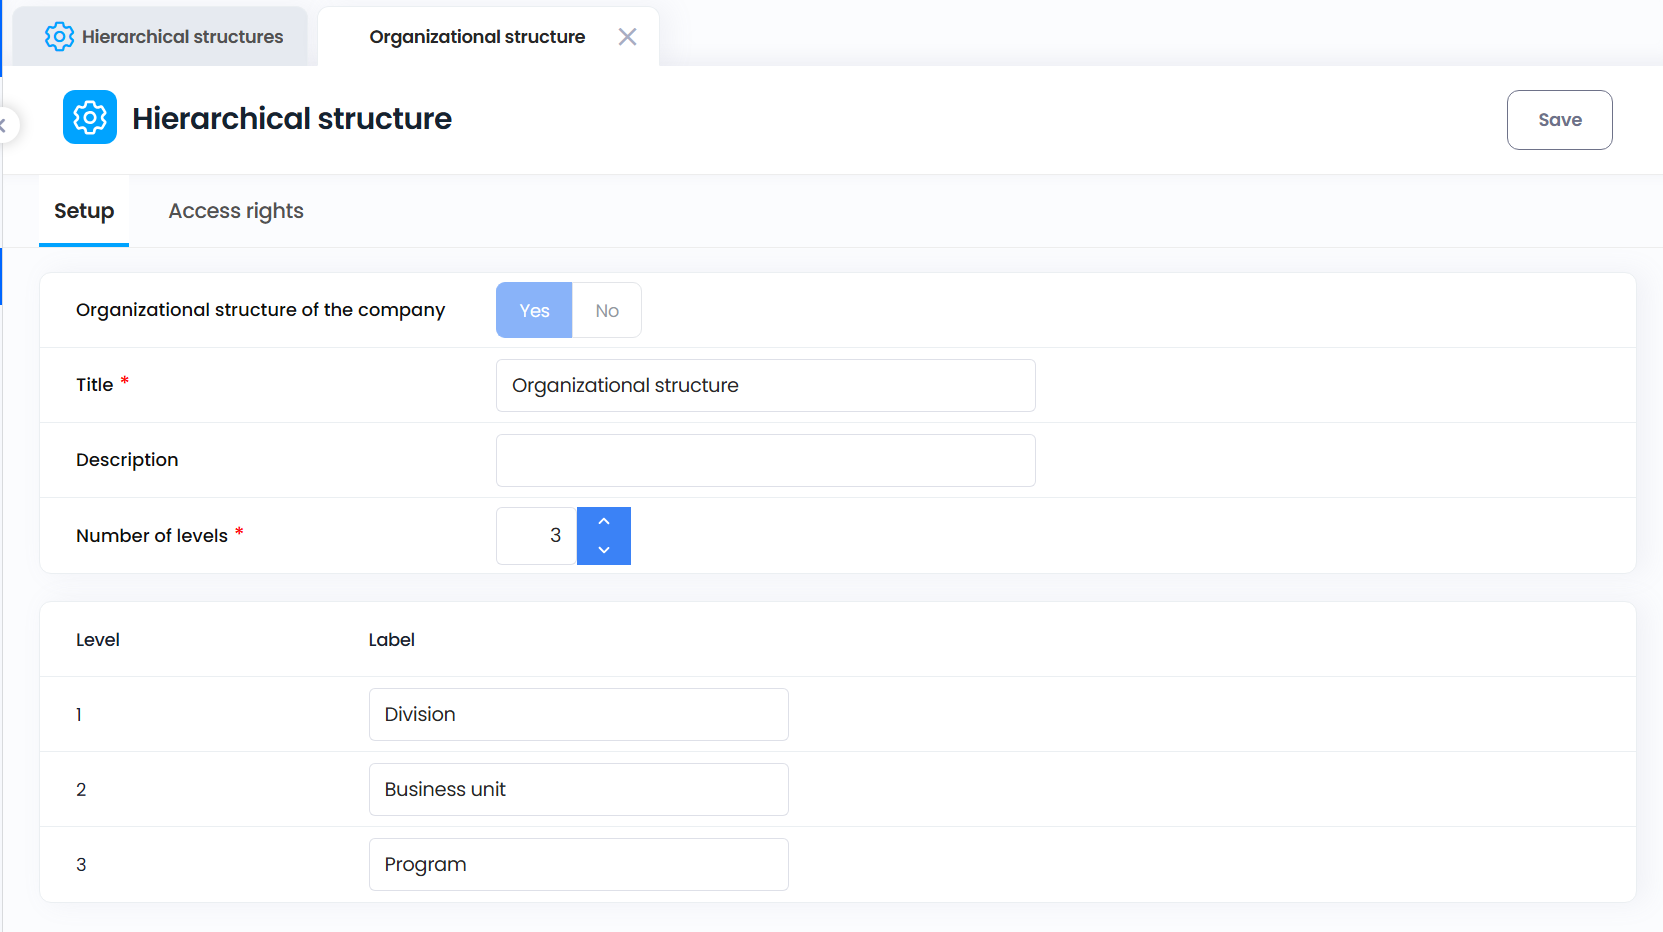
Hierarchical structures
Cerri Project supports defining hierarchical structures, which are organized as trees with one root and multiple branches and sub-branches. This feature is useful for defining an organization’s OBS (Organizational Breakdown Structure) or other structures like product nomenclature.
- By default, the OBS "Organizational structure" includes 3 levels.
- Both resources and projects can link to the OBS. The first hierarchical structure defined in the system is considered the OBS.
Setup tab
This is where the properties of the hierarchical structure are defined. Nodes for each level must be defined separately.
Field | Use |
Title | Name of the hierarchical structure. |
Description | Short description of the structure's purpose. |
Number of level | Speicifies the number of levels in the structure. |
Level 1 to X | Name (labels) for each level. The number of fields correspondsto the number of levels. |
Structure | Representation of the hierarchical structure. |
Access rights tab
Access rights can be managed on the hierarchical structure. There are 3 options:
- No access rights managed in relation to the structure.
- Managers: Managers assigned to each node are used to manage access rights. All managers and substitutes have read access to all project data at that level and its sublevels.
- Managers and resources: Both managers and resources assigned to nodes are used to manage access rights. All managers, manager substitutes, and resources have read access to all project data at that level and its sublevels. (This option is only available for OBS).
To manage access by managers and resources, Cerri Project creates a group. Use the "Group prefix" to prefix group names for better readability in the Access Control List.
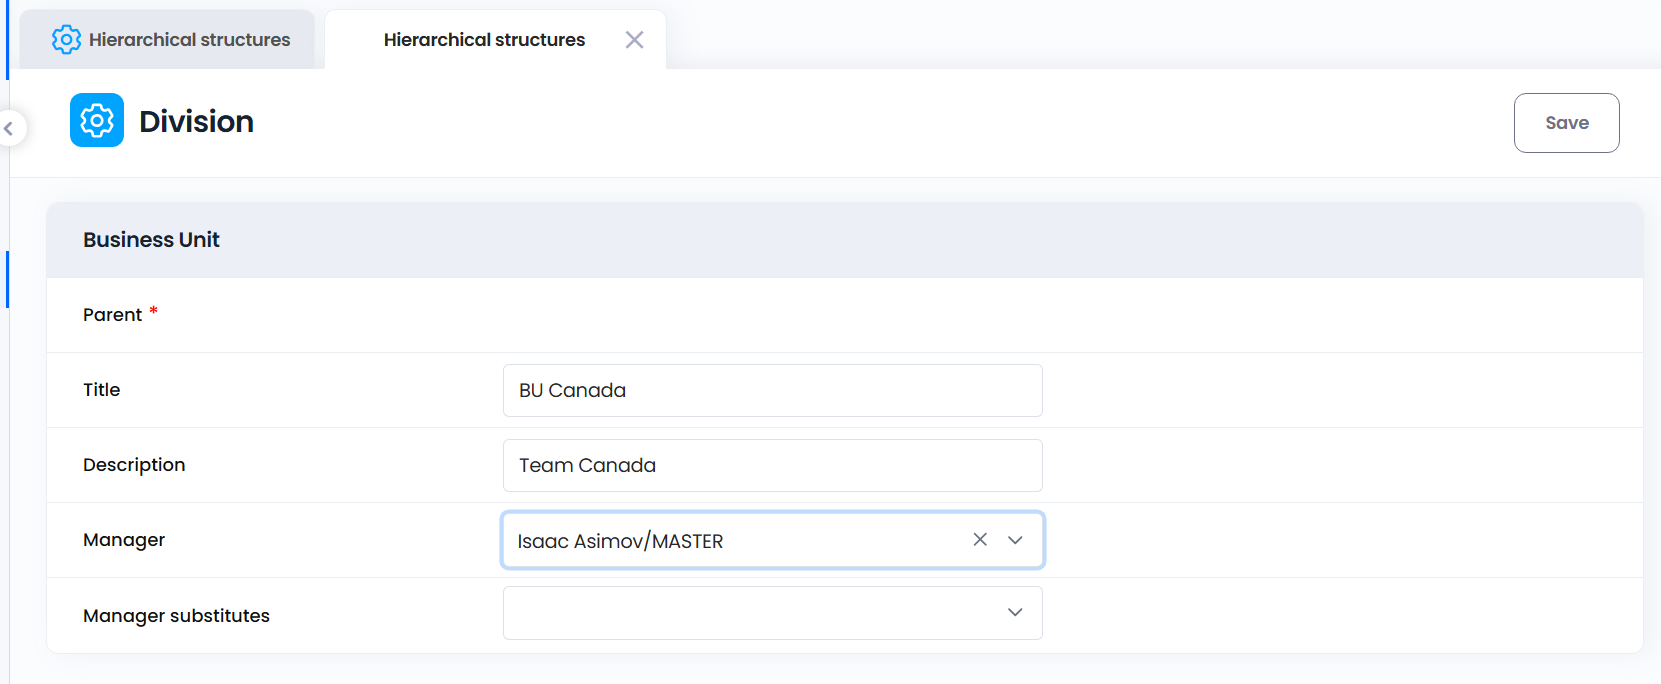
Add a new node to a structure
Steps to add a new node:
- In the hierarchical view of the setup, select the level where the new node will be added.
- Click [Action menu > Create > Create a level under].
- Complete the document using the fields described in the table below.
- Save the document.