To access the Setup & Administration section of the Timesheets database, the Admin user must
click on the gear icon at the top right hand corned of the screen and select [Timesheets] from the drop down list.
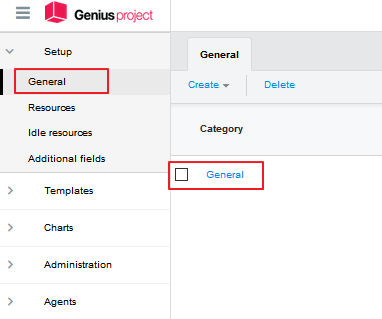
General
Parameters in this section apply to the entire database.
Select «General» from the contextual navigation menu. Open the ‘General’ document from the content window.
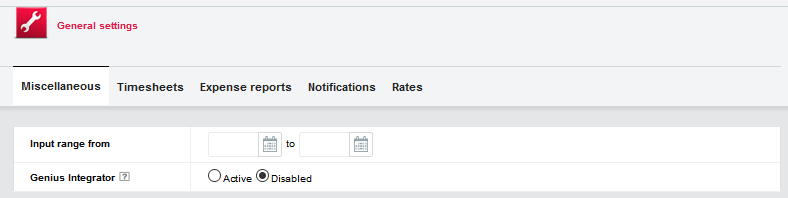
Miscellaneous tab
Fields Use |
Input range from ... to ... To set the input range for the creation of Timesheets or Expense report documents in order to prevent resources from creating |
Fields | Use |
timesheets starting before a given date, or to create them too far in the future. It is possible to leave both fields empty (no control will be performed), to define any of the two dates (allowing the creation of timesheets for any period in the past or the future) or to enter both dates. Only the timesheet or expense report start date must belong to the defined interval. |
Genius Integrator When enabled Genius Integrator makes the management of attached files easier. It allows for the generation of reports and management of Word and Excel templates. It must be enabled to use MSP Direct plan types. Disables the Genius Integrator attachment and Office templates management if needed. See Application manager tasks for further information. |
Timesheets tab

Fields | Use |
Workload unit | The workload unit for task assignments. This parameter should not be modified if there are existing timesheets in the databases. If this is the case and you modify this parameter you may have unexpected results. |
Range of authorized values per cell | To specify the input range allowed in each cell of a 'Timesheet' document. Minimum: the minimum value allowed. '0' means negative values are not allowed. Default is '-24'. Maximum: the maximum value allowed. Default is '24'. Both values are expressed in the workload unit defined above. |
Use two different timesheets on month change | Enable to create a second Timesheet if the new month starts during the week. |

Fields | Use |
Approval mode | To define if the timesheets must be submitted for approval. If an approval mode is defined, the user must submit their timesheets for approval using the [Workflow > To be approved] menu option. Approval mode options are: None: The user changes the timesheet status to 'Completed' on their own, using the [Workflow > Complete] menu option. On the timesheets: Once a timesheet’s status is 'To be approved', the resource in responsible for its approval can approve or deny it. On the details: Once timesheets are submitted for approval, project leaders will be responsible for approving the detail lines corresponding to their projects. |
Approval by the team lead | This option is only available if ‘Approval mode' is set to ‘On the timesheets’. It is used to indicate whether the resource’s team lead is responsible for approving their timesheets or if this task will be delegated to resources with the [Approver] role. If set to 'Yes', the approval is done by the team lead defined in each individual resource’s profile document in the 'Resources' database. The team lead does not need to have the [Approver] role (any resource defined in the 'Resources' database can be defined as another resource’s team lead). The resource document must be published into the 'Timesheets' database and the parameter must be enabled for this approval method to work properly. If set to 'No', then only resources with the [Approver] role will be able to approve the timesheets. Note that whatever the selected option is, resources with the role [Approver] always can approve any timesheet in the status 'To be approved'. |
Update the actual workload of the assignments | This option is not available if 'Approval mode' is set to 'On the details'. In that case, the update of the actual workload will take place directly making approval on the details (by the project leader) only compatible with the direct update of the workload. After approval/ When completed: The time is pushed to the 'Projects' database only after the entire timesheet has been approved or marked |
Fields Use |
completed. (timesheet lines are not pushed to the 'Projects' database until the timesheet is approved or completed) Directly: the time is pushed into the 'Projects' database, regardless of the status of the 'Timesheet' documents. |
Update the final status This option is only available if ‘Update the actual workload of the of the assignments assignments' is set to 'Directly'. After approval / When completed: If a task assignment is marked ‘Completed’ in a timesheet, it will be only be considered once the timesheet is approved or completed (to prevent a task from being marked completed before approval). Directly: If a task assignment is marked ‘Completed’ in a timesheet, it will be taken into account regardless of the status of the 'Timesheet'. |
Type of automatic The default type that will be used by the 'Automatic generation of generation timesheets' agent. If the option 'Use the default value of each user' is set to yes, then the agent will use the value chosen by each user. In this case, if the user has not set a default value, then the general value will be used. |
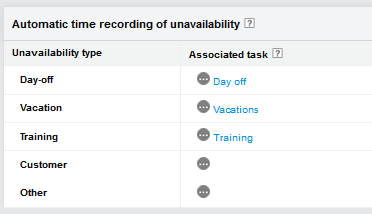
Assign the corresponding tasks of your global Company Project tasks to the unavailability type. This way an automized unavailability time reporting can take place.
Expense reports tab

Fields Use |
Default currency Symbol of the default currency. The default currency is not used in the Timesheets database but was kept for a possible future usage. The list comes from the currencies defined in the General setup document of the 'Portfolio' database. Mandatory. |
Reference currency Symbol of the reference currency. This is the currency that will appear by default in all views of the database showing amounts. The list comes from the currencies defined in the 'General' setup document of the 'Portfolio' database. Mandatory. |
Other currencies The list of currencies that can be used in the Timesheets database (in the Expense report documents). The list of choices comes from the 'Other currencies' field in the 'General' setup document of the 'Portfolio' database. The default currency is automatically added to the list. |
Approval mode To define if the expense reports must be submitted for approval. If an approval mode is defined, the user must change the status of their expense report using the [Workflow > To be approved] menu option. None: The user can mark the expense report 'Completed' using the [Workflow > Complete] menu option. On the expense reports: If the status of an expense report is 'To be approved', the resource in charge of its approval will be able to approve or deny the document. On the details: Project leaders can approve or deny the expense details corresponding to their projects, for expense reports set 'To be approved' |
Approval by team lead This option is only available if 'Approval mode' is set to 'On the expense reports'. It is used to indicate whether the resource’s team lead is responsible for approving their expense reports or if this task will be delegated to resources with the [Approver] role. If set to 'Yes', the approval is done by the team lead defined in each individual resource’s profile document in the 'Resources' database. The team lead does not need to have the [Approver] role (any resource defined in the 'Resources' database can be defined as another resource’s team lead). The resource document must be published into |
Fields | Use |
the 'Timesheets' database and the parameter must be enabled for this approval method to work properly If 'No', then only resources with the [Approver] role will be able to approve the expense reports. Whatever the selected option is, resources with the [Approver] role can always approve any expense report with a status of 'To be approved' |
Expense types List of the types of expenses to be used in the expense reports. Keywords selection field. |
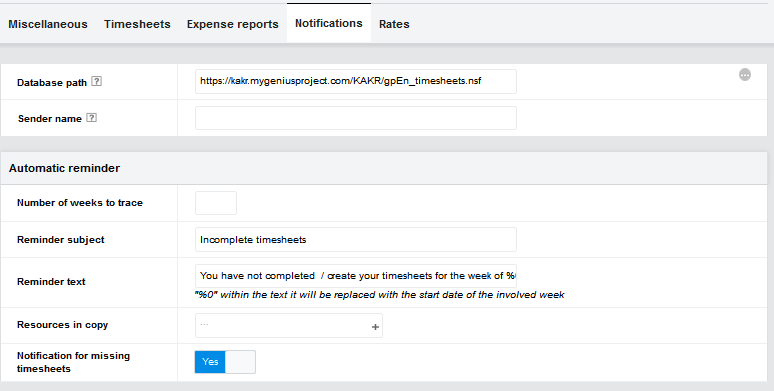
Notifications tab
Fields | Use |
|
Database path Complete URL of the database. Used to create links in notifications for Web usage. |
Sender name It defines the sender name of automatic e-mail notifications (reminders for delayed timesheets, refused timesheets, etc.). The name of the sender must be entered in Internet format, for example: 'John Smith<jsmith@acme.com>'. |
Automatic reminder
Fields | Use |
|
Number of weeks to trace | Defines the number of weeks in the past that the agent will check for incomplete timesheets (that is timesheets that are still 'In progress' or missing timesheets). |
Reminder subject | The subject of the notification e-mail. Value '%0' will be replaced with the start date of the corresponding week. |
Reminder text | Content of notification e-mail. Value '%0' will be replaced with the start date of the corresponding week. |
Resources in copy | Resources who will receive a copy of the e-mail notification. |
Notification for missing timesheets | Options are 'Yes' or 'No'. Indicate whether a reminder should be sent when timesheets |
Fields | Use |
|
have not been submitted for a given week. If set to 'No', then a reminder will only be sent if an incomplete Timesheet exists for a given week. |
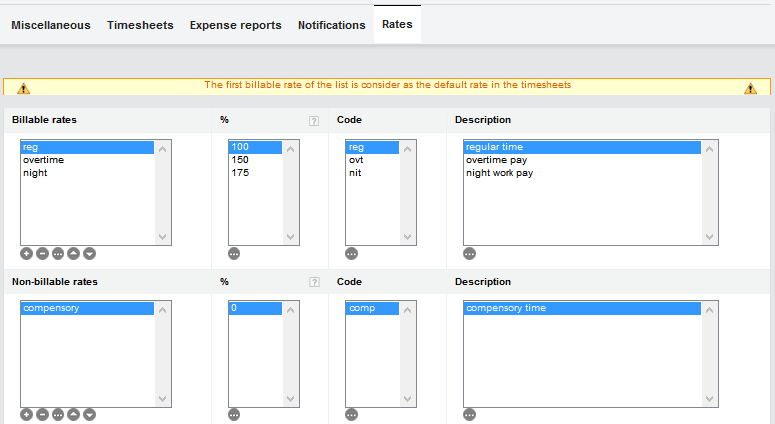
Rates tab
The rates tab is used to define different types of billable and non-billable rates to be set for each timesheet line. Each rate type must be defined as a percentage of the default rate. The default rate being referenced will always be the one associated to the resource submitting the timesheet.
By defining different rate types organizations can automatically calculate billing variations based on different circumstances. For example, if an organization charges 150% of the default rate for a resource working overtime, they can create a rate type to accomplish this.
The input of these fields is done using the  buttons.
Fields | Use |
Billable rates Used to define the list of different billable rate types. The rates are expressed in % of the normal rate as it is defined in the 'Rates' section of the Resource document. They are used in the timesheets lines to compute the actual cost of tasks. They will also be used to compute the billable cost of the task. Rate: abbreviation of the rate type’s name. This is how it will display in the selection list in the timesheet. Due to the limited display space, it is recommended to use short abbreviations or acronyms. %: percentage to apply to the normal rate defined for the resource on the corresponding task. Code: rate code, saved in the document. The code must be unique. Description: a detailed description of the rate.
These four fields must be entered for each rate to be defined correctly |
Non-billable rates Used to define non-billable rate types. The rates are expressed in % of the normal rate as it is defined in the 'Rates' section of the 'Resource' document. They are used in the timesheets lines to compute the actual |
Fields Use |
cost of tasks. With non-billable rates, the time entry will not be added to the billable cost of the task. Rate: abbreviation of the rate. This is how it will display in the selection list in the timesheet. Due to the limited display space, it is recommended to use short abbreviations or acronyms. %: percentage to apply to the normal rate defined for the resource on the corresponding task. Code: rate code, saved in the document. The code must be unique. Description: a detailed description of the rate. These four fields must be entered for each rate to be defined correctly. |
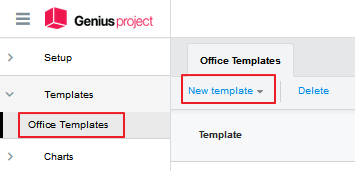
Templates
This place to define office template for timesheet and expenses entry lists and reports. See the chapter "Office templates" for more information.
Geniusproject provides the ability to export valuable data directly from a view into a Microsoft® Excel template using the Genius Integrator tool. This makes it possible to use extracted Geniusproject data to create Microsoft® Excel charts, powerful reports using Microsoft® Excel pivot tables, as well as manipulate data for simulations. In addition reports can be shared with individuals who do not have access to the Geniusproject application.
Charts
See Charts in the Resource section.