Creating a new Document (v8.xx)
To create a new generic document:
Click on "Create" in the navigation and select "Other document".

Note: A new generic document can also be created using the "Create" button on the menu action bar and selecting "Other document".
From the content window click on the [Create] menu and select “Other document”

A dialogue box will open.
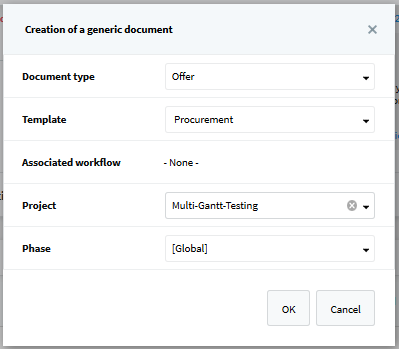
Select the type of document you would like to create. The template to use (if one or more exist).
The system will automatically display the workflow associated to the template (if one exists).
Select the project this new document is for.
Select the phase the new document should be associated to. If the document is not associated to any phase in particular, you can select "Global".
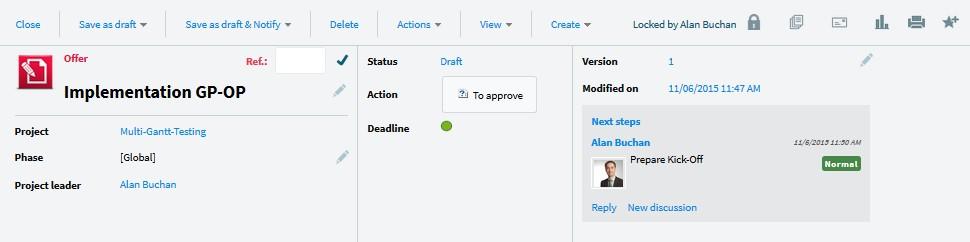
The document header
When creating a new document, even when using a customized template, Geniusproject automatically builds a document header to classify the document in the appropriate project and phase.
The document content. The [Content] tab
It consists of a rich text field where the relevant information or the document description can be input.

Manage attached files
Geniusproject allows users to attache any type of file to a generic document. This is done on the [Attachment] tab.
Note: In the case of a pre-defined document template, it is very possible that the generic document already contains an attached file.
Attaching a file
Navigate to the [Attachment] tab.
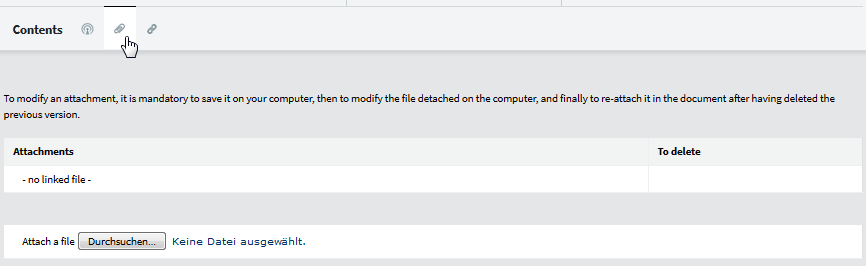
Place the document in Edit mode. Click on the "Choose file" button.
A window to browse your files and folders open. Choose the desired file.
The file name of the selected document will be displayed next to the "Choose file" button however, the file is not yet saved in Geniusproject.
Click "Save" on the action menu bar and select "Without closing" or "And close".
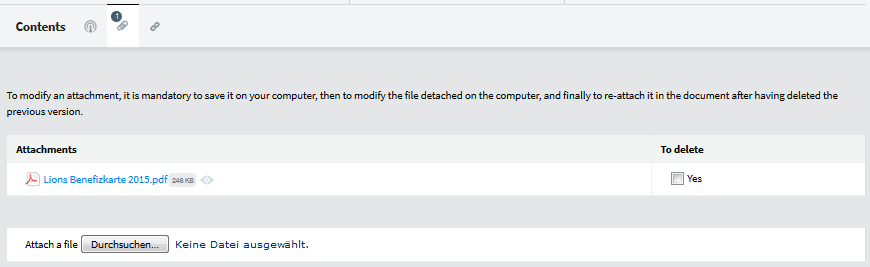
At this time the file is now saved in Geniusproject. The image below displays how the attached file is displayed on the Geniusproject page.
The attached file is displayed with the icon representing its file type, the file name and file size. A marker on the [Attachment] tab indicates how many files are attached in total.
Opening, preview an attached file
Attached files can be opened with their associated application (Adobe, Word, Excel...) simply by double clicking on them. In this case the system will download the file to view it.
Or, when clicking on the "Eye" icon for certain types of files, you can preview the contents of the document, like in the image below, without the system downloading it

Deleting an attached file
Open the document in edit mode.
Navigate to the [Attachment] tab and place a check in the "To delete" box corresponding to the document you want to remove.

Save the document. At this moment the attached file will be deleted.
Editing an attached file
To edit an attached file:
Detach the file from the generic document. Edit it locally.
Re-attach the file to the generic document.
Managing Links between Documents
Managing links is a very unique function in Geniusproject. In many cases, dependencies and links between documents exist ( i.e. linking reference documents or agreements to master agreements). Linked documents are directly accessible.
There are 3 types of links:
"Links to": Links created by users to connect one document to another in Geniusproject.
"External Links": Links created by users to an external URL outside of genius Project. Can be very useful in creating links to external document references.
"Incoming links": These are links created by the system that are logical links between records such as with previous versions of a record or links between task and assignments. Or, they can be links created automatically by the system back to corresponding "Link to" links.

Note: A label on the [Link] tab will indicate the number of links on that are there.
Creating an Internal Genius Project Link
Open the document that the link will originate from, in edit mode. Navigate to the [Link] tab and click "Add".
A dialog box will open where you can select the record(s) to link to.


Specify which type of document you are looking for in the "Document type" field and which project you would like to select from in the "Project" field. The values selected in these fields will narrow down the list of choices for section 1.
Use the arrows in between sections 1 and 2 to select the desired document(s) to link to.
Section 2 displays the selected documents. Click "OK" to validate the selection(s).
The new links will appear in the document.

Deleting an Internal Genius Project Link
Open the document containing the link to be removed, in edit mode.
Navigate to the [Link] tab and select the link that is to be removed from the "Links to" section.
Click the "Remove" button and the link will be deleted from page. Be sure to save the
document to finalize the deletion.

Creating an external Link
External links are URLs
Open the document where the link will be created, in edit mode.
Navigate to the [Link] and enter the URL address in the "External Links" field.

Click to the to validate the entry.
Geniusproject verifies the URL and if it is valid it will save the link.
Deleting an External Link
Open the document with the link, in edit mode
Navigate to the [Link] tab, select the link to be removed from the "External Links" section and click on the to the right of the link.

Accessing a link
Simply click directly on the link and the destination document or URL will open automatically.
Manage Document Versions
Geniusproject allows for easy document version tracking. The version numbers are automatically incremented and old versions are stored.
To create a new version of a Document:
Select the document to be edited and click "Edit" on the menu action bar for the view.
From the [Edit] menu drop down list, select "Major version" to change the main digit of the version number (1.0/2.0…) or select "Minor version" to change the small digit (1.0/1.1...).The system will then create a new version of the document.
Note: Saving a new document version can be the result of an automatic process driven by workflow definitions.
Previous versions are easily accessible from the document itself.

Users can also restore a previous version with a simple click.

Document History Tracking
The history section of each document keeps track of document changes, including creation, version, copy and status changes. To access a document’s history record click on the icon on the top right, above the section line.
Note: The history of a record is also displayed in the [Genius Live!] tab for each record. See the chapter " Genius Live!" for more information.

Share and Distribute Documents
Making the same information available to a greater group of people in "real time" will undoubtedly save time. That’s why Geniusproject's distribution function is automatic: information is exchanged securely with no specific intervention required on the part of the user.
Each document is created with its own distribution settings that indicate who the document should be, (or has been) sent to. To access distribution settings click on the icon, on the top right side above the section line.
See the chapter "Project team collaboration" for more information.

Manage Access to Documents (Security)
Geniusproject’s advanced and powerful security and access definition is available for any document. Clear and easy security settings are available in each document. Default security settings can be setup at the system and project level.
To view the access rights settings for a document, click on the icon on the top right side above the section line.
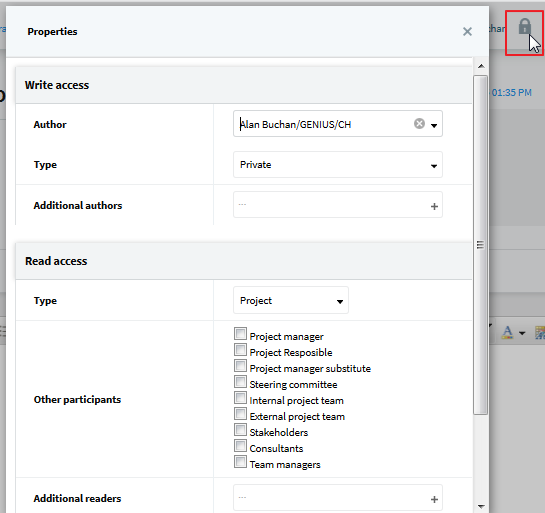
Access rights are defined for each document author. By default, the name of the author is the name of the resource that is creating or modifying the document. This field can be modified; for example, an assistant who wants to create a document for the supervisor can indicate their supervisor’s name as the author.
Write and Read access can also be set in for the project community:
Public: anyone having access to the system.
Project: all members of the project team.
Distribution: the resources defined in the "Distribution" list for this document.
Private: nobody other than the author(s).
It is also possible to define read access according to business roles.
Searching for Documents and Content
Geniusproject’s "document" views allow users to easily locate all documents that reside in the system. Available views sort documents by type, by project or even project phase. All of these views can be found in the [Documents] module.

Geniusproject also has a very powerful full text search engine which crawls through all records and attached files in the system, based on specified searching criteria. For more information how to use the search engine, see the chapter "Searching in Geniusproject ".
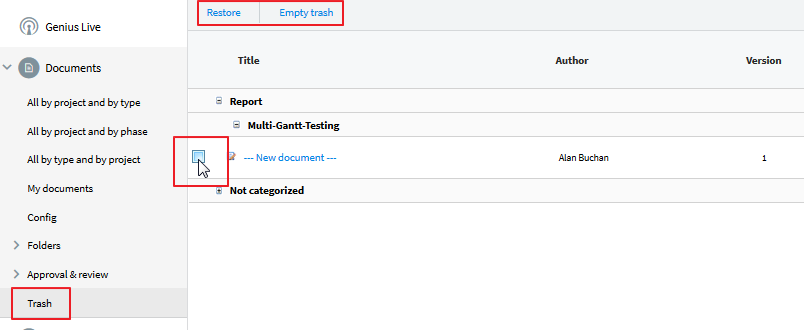
Remove Document from Trash
To restore a trashed document simple go to [Documents] and click [Trash] in menu.
Select the Document to restore. Select [Restore] on top.
Related Articles
Creating a New Document (v10.xx) [TR]
To create a new generic document: Click on "Create" in the navigation menu Select "Other documents". Note: A new generic document can also be created using the "Create" button on the menu action bar and selecting "Other document". From the content ...Creating New Resources (v8.xx)
Every person to be included in a project must be defined as a resource. Resources can be created directly from the [Resources] module. To create a new resource: Navigate to the [Resources] module. Click on the "Resources list" view and select "Human ...Creating New Resources (v10.xx)
Every person included in a project must first be defined as a resource. Resources are managed and created directly in the [Resources] module. Steps to create a new resource: 1. Navigate to the [Resources] module. 2. Click on the "Resources list" view ...Document Templates
In addition to standard documents such as issue reports or progress reports, Geniusproject provides a document template library in which to store predefined documents. The document template library is available in each 'Projects' module. However, it ...Document Template With Customized Forms (v8.xx)
Creating a Geniusproject 'Template Document' that contains a customized data structure first requires designing the structure (ask your Genius consultant for this). Geniusproject can contain as many subforms as needed to be used in 'Document ...